10 KiB
| title | published | description | tags | cover_image | canonical_url | id |
|---|---|---|---|---|---|---|
| #90DaysOfDevOps - The anatomy of a Docker Image - Day 45 | false | 90DaysOfDevOps - The anatomy of a Docker Image | devops, 90daysofdevops, learning | null | null | 1048777 |
The anatomy of a Docker Image
In the last session we covered some basics of how we can use Docker Desktop combined with DockerHub to deploy and run some verified images. A recap on what an image is, you won't forget things if I keep mentioning.
A Docker image is a read-only template that contains a set of instructions for creating a container that can run on the Docker platform. It provides a convenient way to package up applications and preconfigured server environments, which you can use for your own private use or share publicly with other Docker users. Docker images are also the starting point for anyone using Docker for the first time.
What happens if we want to create our own Docker image? For us to do this we would create a Dockerfile. You saw how we could take that Ubuntu container image and we could add our software and we would have our container image with the software that we wanted and everything is good, however if that container is shut down or thrown away then all those software updates and installations go away there is no repeatable version of what we had done. So that is great for showing off the capabilities but it doesn't help with the transport of images across multiple environments with the same set of software installed each time the container is ran.
What is a Dockerfile
A dockerfile is a text file that contains commands you would normally execute manually in order to build a docker image. Docker can build images automatically by reading the instructions we have in our dockerfile.
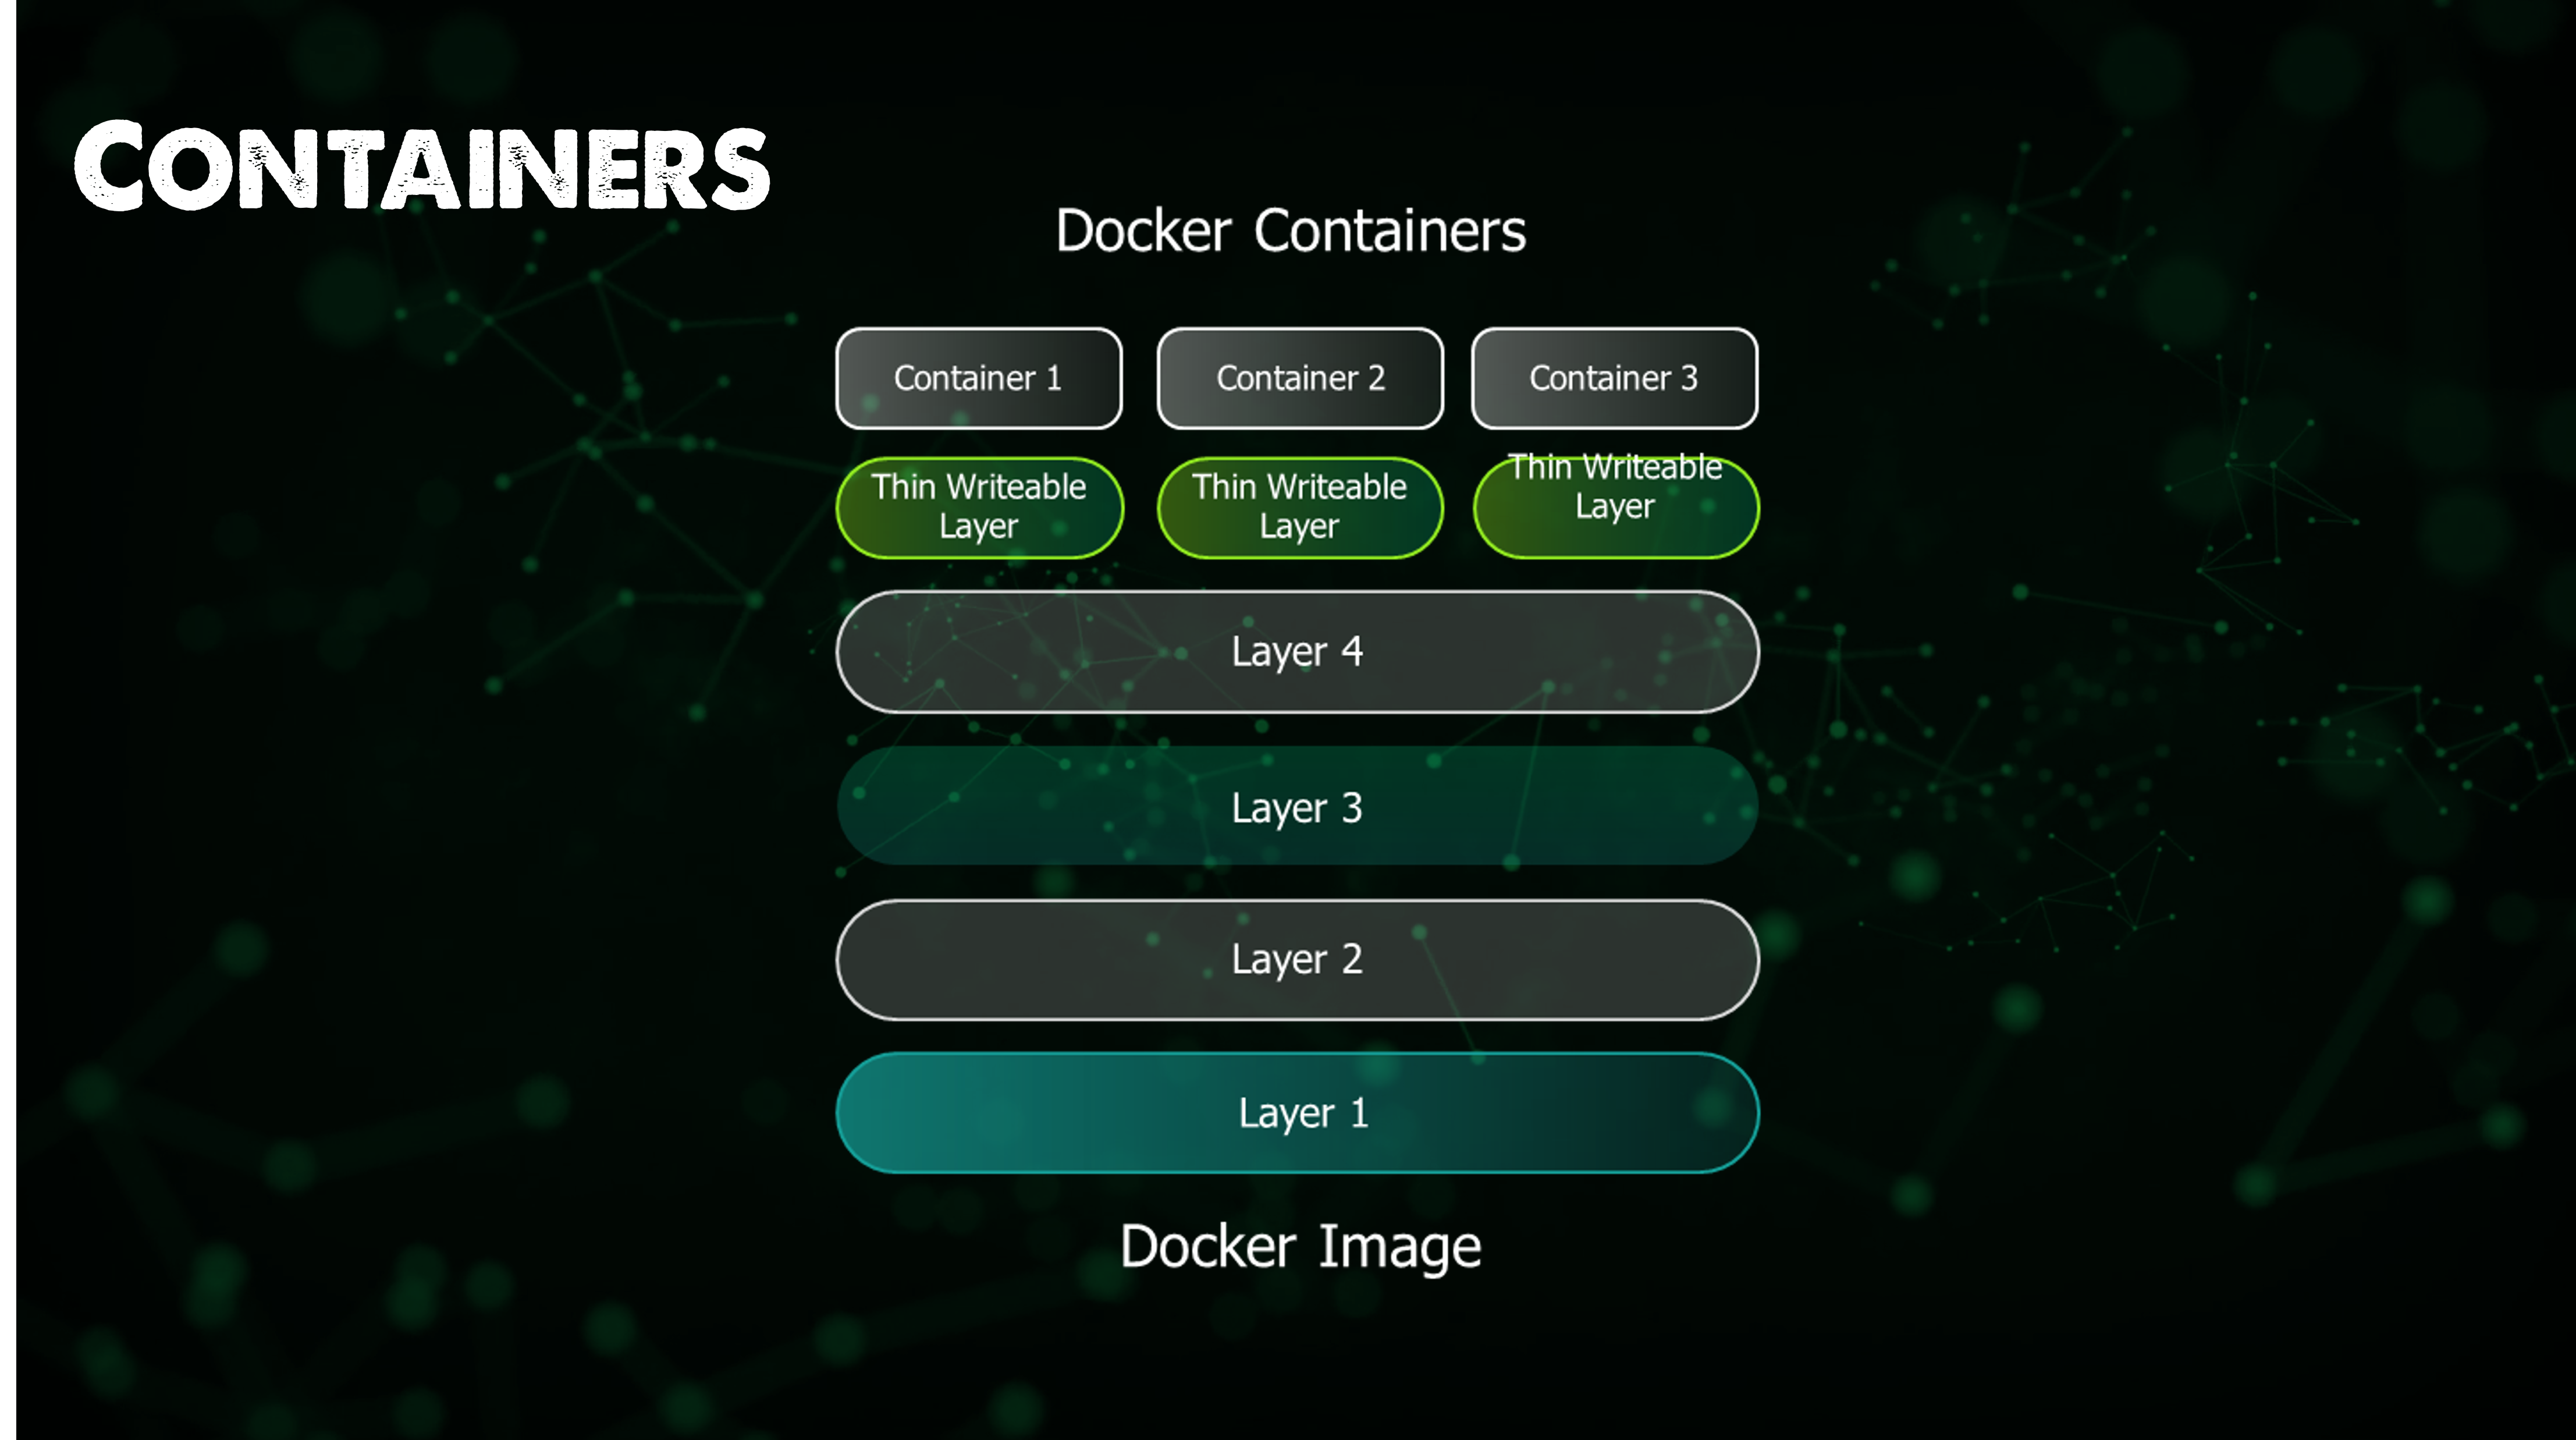
Each of the files that make up a docker image is known as a layer. these layers form a series of images, built on top of each other in stages. Each layer is dependant on the layer immediatly below it. The order of your layers is key to the effciency of the lifecycle management of your docker images.
We should organise our layers that change most often as high in the stack as possible, this is because when you make changes to a layer in your image, Docker not only rebuilds that particular layer but all layers built from it. Therefore a change to a layer at the top involves the least amount of work to rebuild the entire image.
Each time docker launches a container from an image (like we ran yesterday) it adds a writeable layer, known as the container layer. This stores all changes to the container throughout its runtime. This layer is the only difference between a live operational container and the source image itself. Any number of like for like containers can share access to the same underlying image while maintaining their own individual state.
Back to the example we used yesterday with the Ubuntu image. We could run that same command multiple times and on the first container we could go and install pinta and on the second we could install figlet two different applications, different purpose, different size etc etc. Each container that we deployed share the same image but not the same state and then that state is then gone when we remove the container.
Following the example above with the Ubuntu image, but also many other ready built container images available on DockerHub and other third party repositories. These images are generally known as the parent image. It is the foundations upon which all other layers are build and provides the basic building blocks for our container environments.
Together with a set of individual layer files, a Docker image also includes an additional file known as a manifest. This is essentially a description of the image in JSON format and comprises information such as image tags, a digital signature, and details on how to configure the container for different types of host platforms.
How to create a docker image
There are two ways we can create a docker image. We can do it a little on the fly with the process that we started yesterday, we pick our base image we spin up that container, we install all of the software and depenancies that we wish to have on our container.
Then we can use the docker commit container name then we have a local copy of this image under docker images and in our docker desktop images tab.
Super simple, I would not recommend this method unless you want to understand the process, it is going to be very difficult to manage lifecycle management this way and a lot of manual configuration/reconfiguration. But it is the quickest and most simple ways to build a docker image. Great for testing, troubleshooting, validating dependencies etc.
The way we intend to build our image is through a dockerfile. Which gives us a clean, compact and repeatable way to create our images. Much easier lifecycle management and easy integration into Continous integration and Continous delivery procesess. But as you might gathered it is a little more difficult than the first mentioned process.
Using the dockerfile method is much more in tune with real-world, enterprise grade container deployments.
A dockerfile is a three-step process whereby you create the dockerfile and add the commands you need to assemble the image.
The following table shows some of the dockerfile statements we will be using or that you will most likely be using.
| Command | Purpose |
|---|---|
| FROM | To specify the parent image. |
| WORKDIR | To set the working directory for any commands that follow in the Dockerfile. |
| RUN | To install any applications and packages required for your container. |
| COPY | To copy over files or directories from a specific location. |
| ADD | As COPY, but also able to handle remote URLs and unpack compressed files. |
| ENTRYPOINT | Command that will always be executed when the container starts. If not specified, the default is /bin/sh -c |
| .md | Arguments passed to the entrypoint. If ENTRYPOINT is not set (defaults to /bin/sh -c), the .mdwill be the commands the container executes. |
| EXPOSE | To define which port through which to access your container application. |
| LABEL | To add metadata to the image. |
Now we have the detail on how to build our first dockerfile we can create a working directory and create our dockerfile. I have created a working directory within this repository where you can see the files and folders I have to walk through. Containers
In this directory I am going to create a .dockerignore file similar to the .gitignore we used in the last section. This file will list any files that would otherwise be created during the Docker build process, which you want to exclude from the final build.
Remember everything about containers is about being compact, as fast as possible with no bloat.
I want to create a very simple Dockerfile with the below layout also can be found in the folder linked above.
# Use the official Ubuntu 18.04 as base
FROM ubuntu:18.04
# Install nginx and curl
RUN apt-get update && apt-get upgrade -y
RUN apt-get install -y nginx curl
RUN rm -rf /var/lib/apt/lists/*
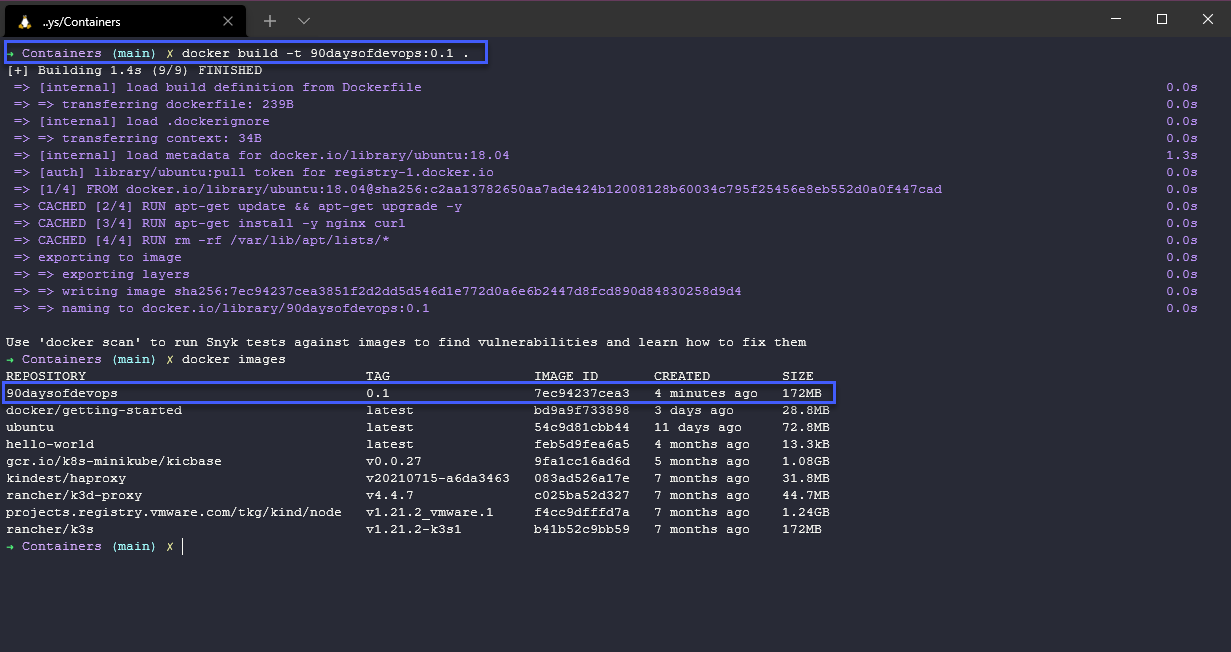
Navigate to this directory in your terminal, and then run docker build -t 90daysofdevops:0.1 . we are using the -t and then setting an image name and tag.
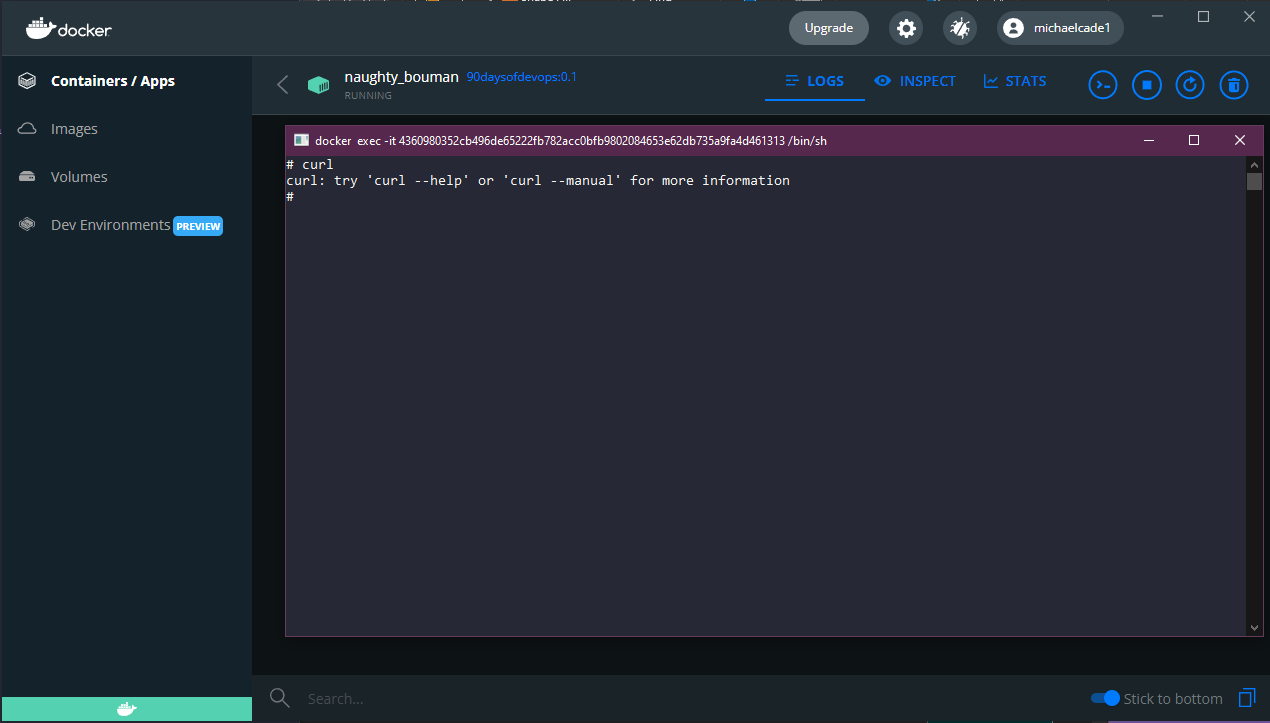
Now we have created our image we can then go and run our image using Docker Desktop or we could use the docker command line. I have used Docker Desktop I have fired up a container and you can see that we have curl available to us in the cli of the container.
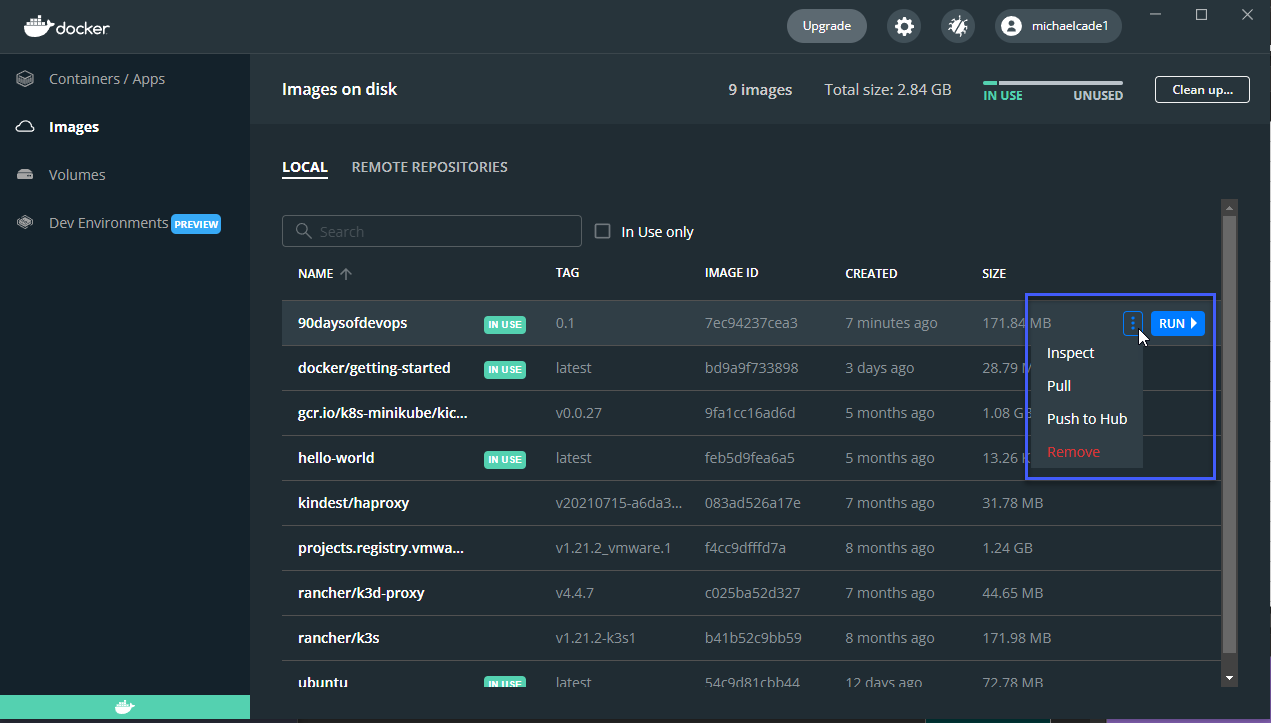
Whilst in Docker Desktop there is also the ability to leverage the UI to do some more tasks with this new image.
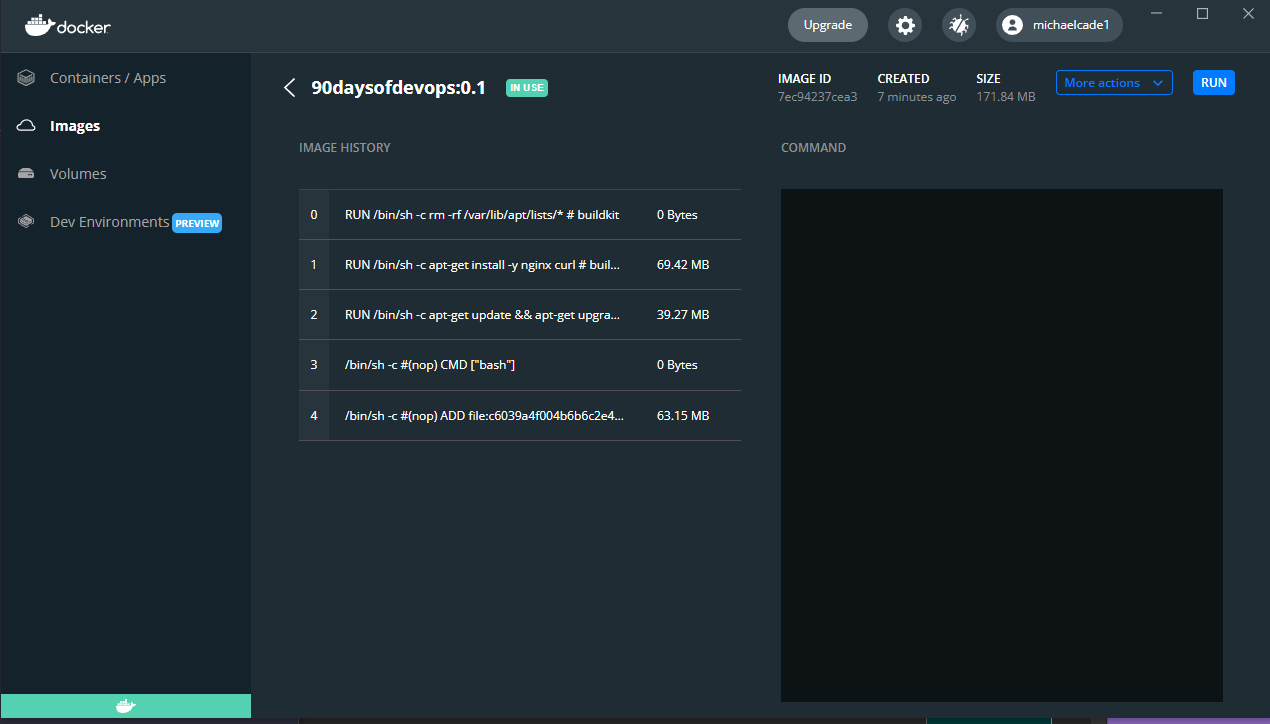
We can inspect our image, in doing so you see very much the dockerfile and the lines of code that we wanted to run within our container.
We have a pull option, now this would fail for us because this image is not hosted anywhere so we would get that as an error. However we do have a Push to hub which would enable us to push our image to DockerHub.
If you are using the same docker build we ran earlier then this would not work either, you would need the build command to be docker build -t {{username}}/{{imagename}}:{{version}}
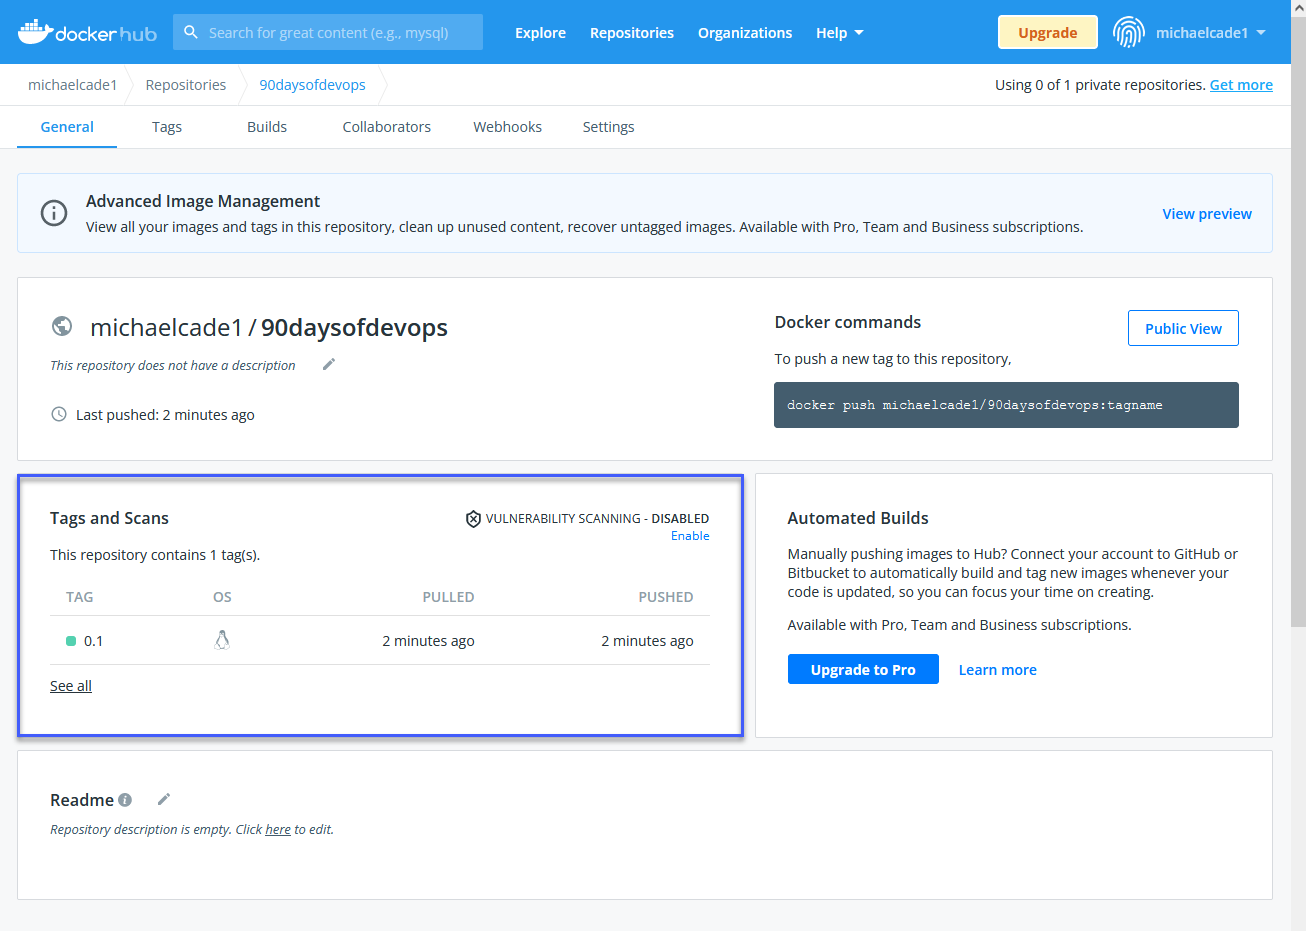
Then if we go and take a look in our DockerHub repository you can see that we just pushed a new image. Now in Docker Desktop we would be able to use that pull tab.
Resources
- TechWorld with Nana - Docker Tutorial for Beginners
- Programming with Mosh - Docker Tutorial for Beginners
- Docker Tutorial for Beginners - What is Docker? Introduction to Containers
- WSL 2 with Docker getting started
- Blog on gettng started building a docker image
- Docker documentation for building an image
See you on Day 46
