3.5 KiB
Day 53: AWS Systems Manager
AWS Systems Manager is a fully managed service that allows users to manage and automate operational tasks both on their AWS and on-premises resources. It provides a centralized platform for managing AWS resources, virtual machines, and applications. It enables DevOps professionals to automate operational tasks, maintain compliance, and reduce operational costs.
With AWS Systems Manager, users can perform tasks such as automating patch management, automating OS and application deployments, creating and managing Amazon Machine Images (AMIs), and monitoring resource utilization. It also provides a set of tools for configuring and managing instances, which includes run commands, state manager, inventory, and maintenance windows.
Furthermore, AWS Systems Manager provides a unified view of operational data, allowing users to visualize and monitor operational data across their AWS infrastructure, including EC2 instances, on-premises servers, and AWS services. This allows users to identify and resolve issues faster, improving operational efficiency and reducing downtime.
How to Get Started with AWS System Manager?
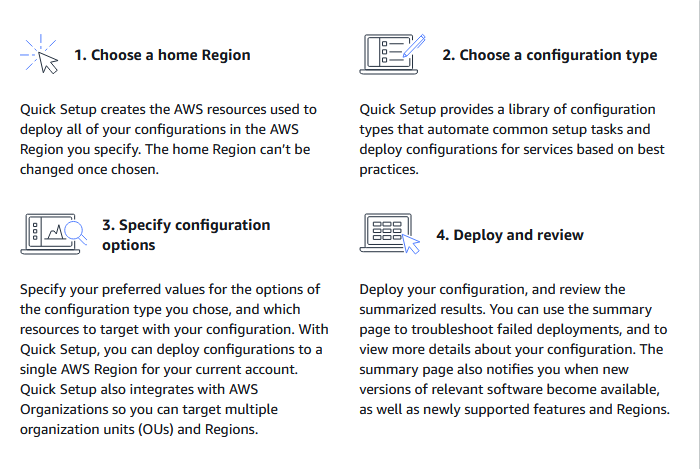
Getting started with AWS System Manager is as easy as 1, 2, 3, 4 😄:
Step 1: Navigate to the AWS System Manager Console
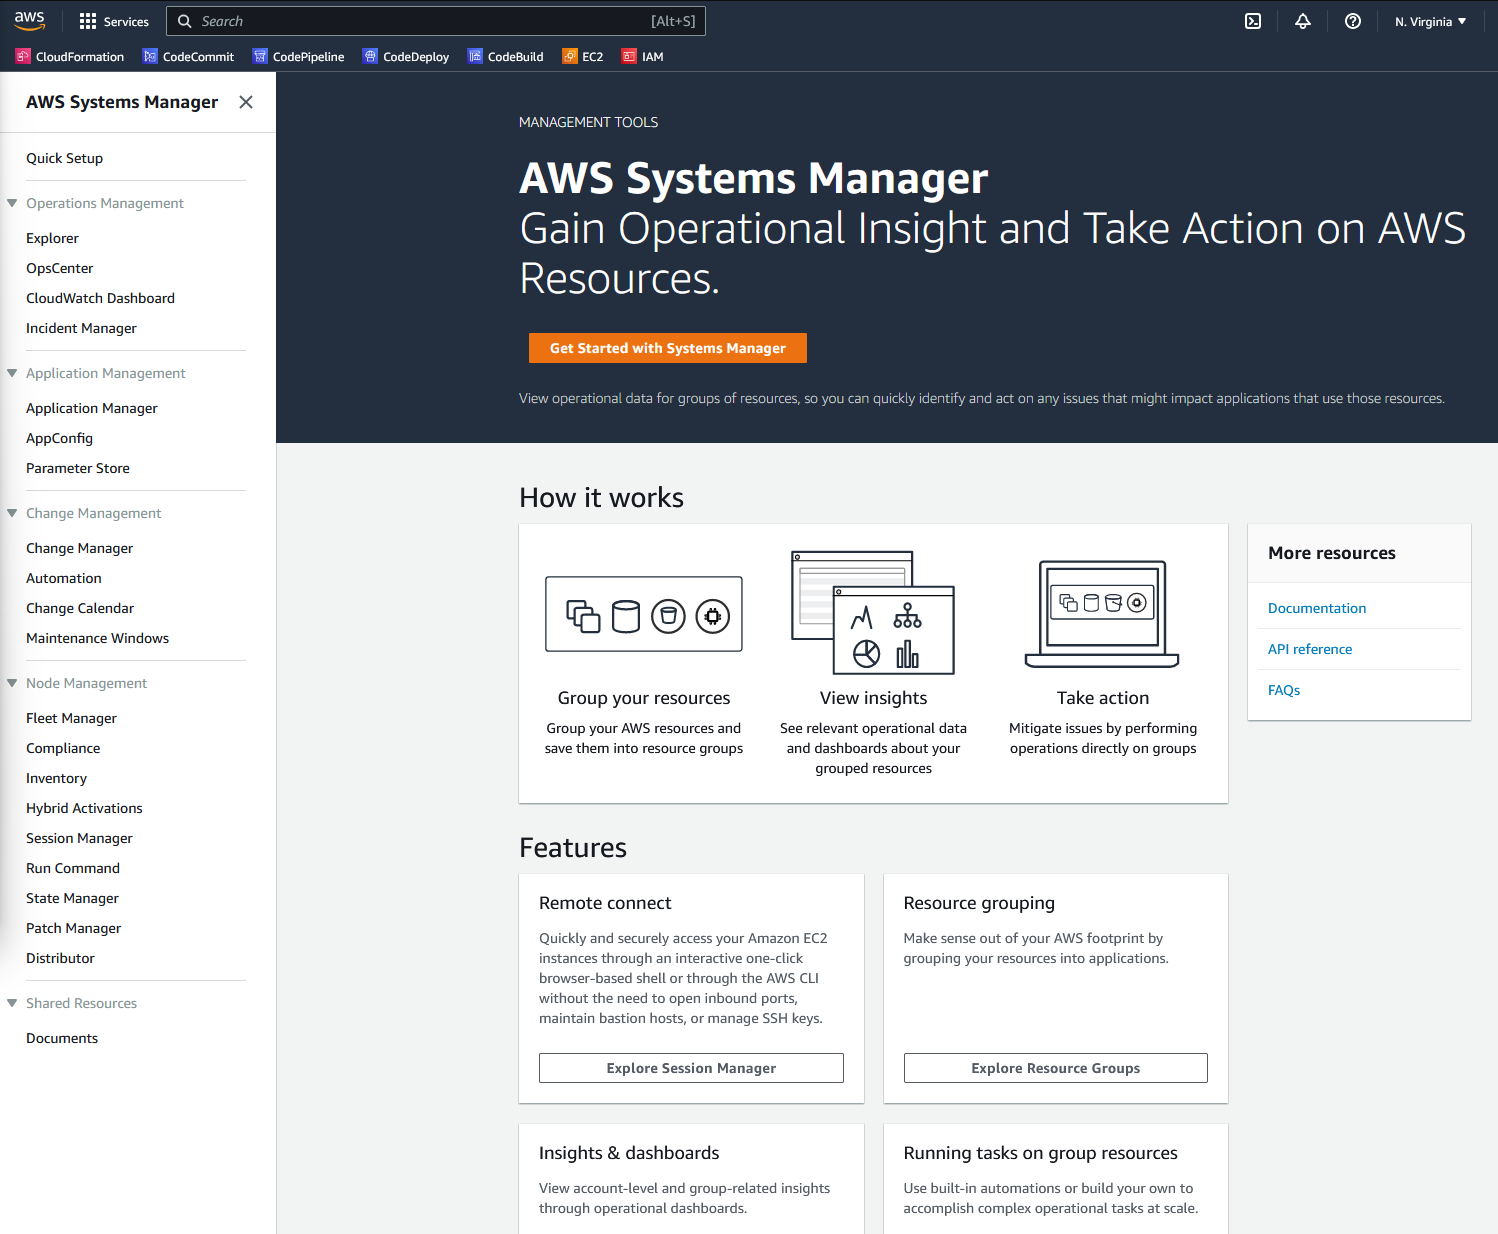
Once you have an AWS account, create 2 windows servers and 2 linus servers (free tier of course 😉) and navigate to the AWS System Manager console. The console provides a unified interface for managing AWS resources, including EC2 instances, on-premises servers, and other resources:
 Click the "get started" button and choose your preferred region (I picked us-east-1)
Step 2: Choose a configuration type
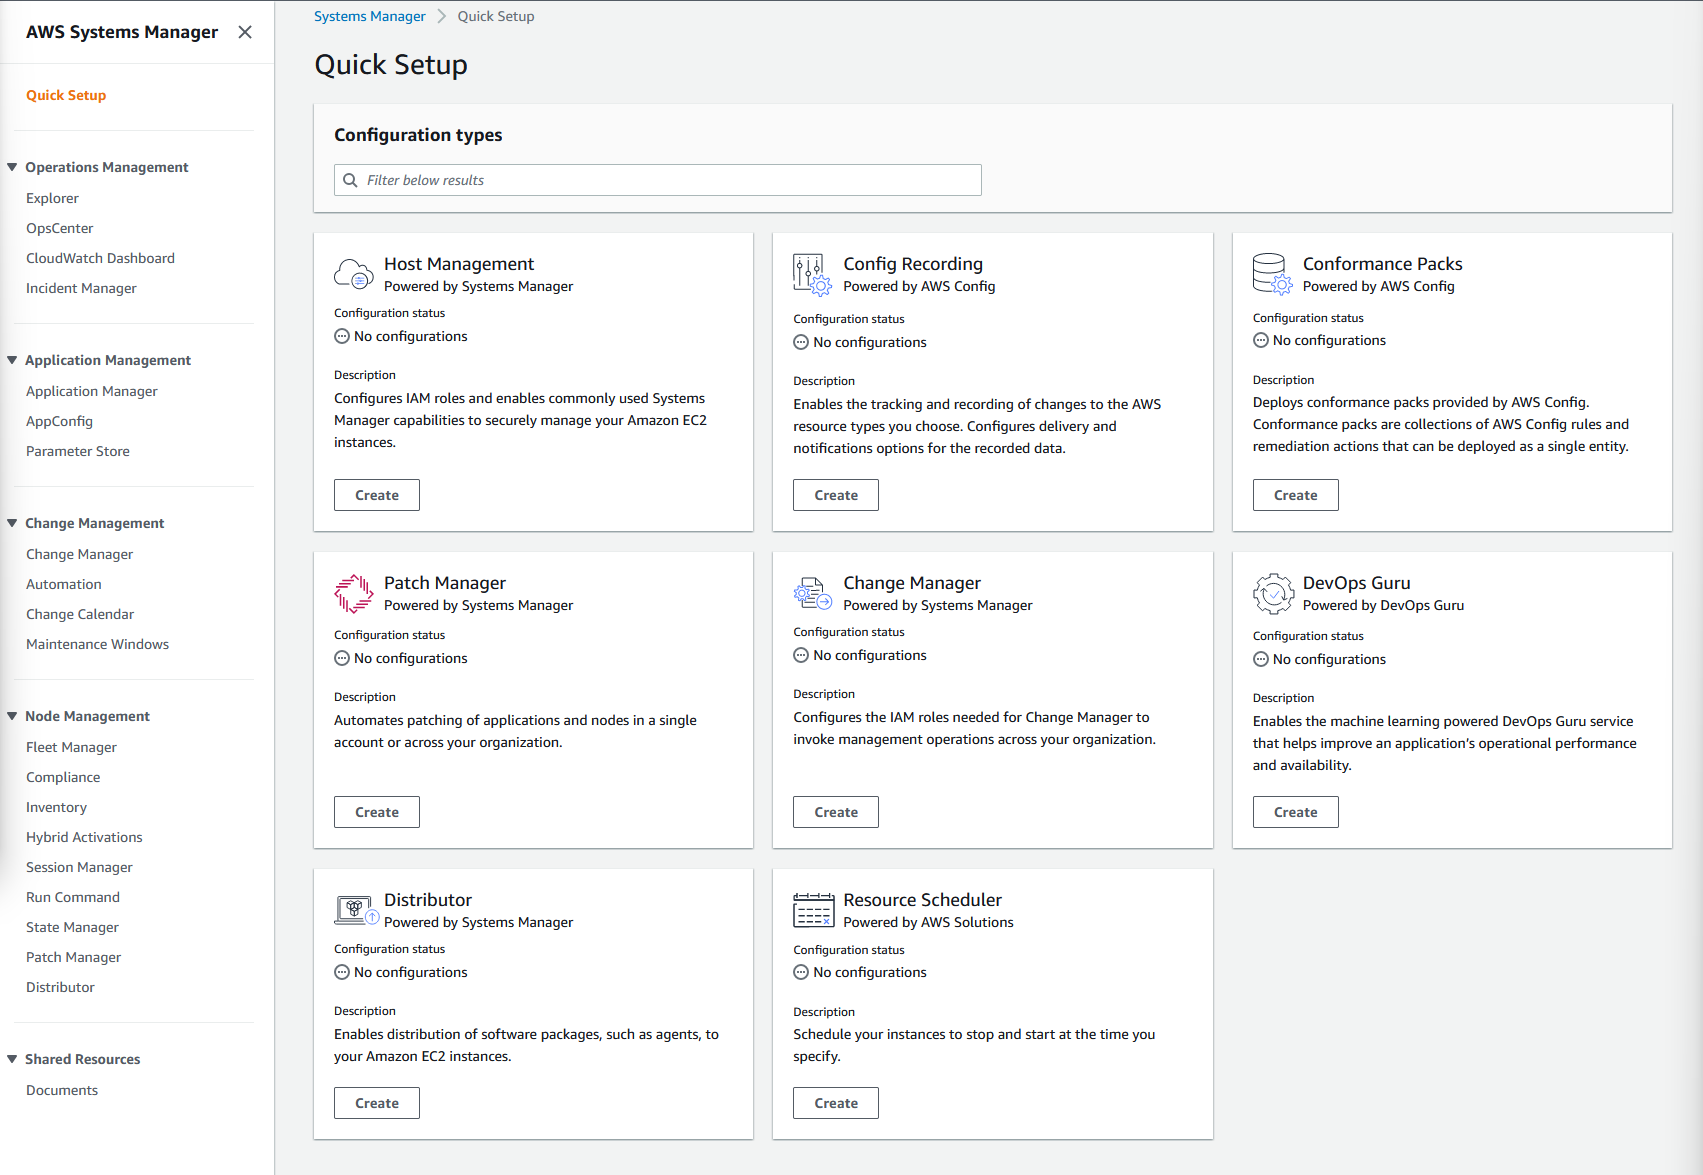
The next step is to configure AWS Systems Manager to manage your resources. You can do this by selecting one of the quick setup common tasks (or create a custom setup type of your own choosing):
 For my needs I'm going to choose "Patch Manager" - in the resources below we will have additional scenarios that you can experiment with. Watch "Patch and manage your AWS Instances in MINUTES with AWS Systems Manager" to see this step in action.
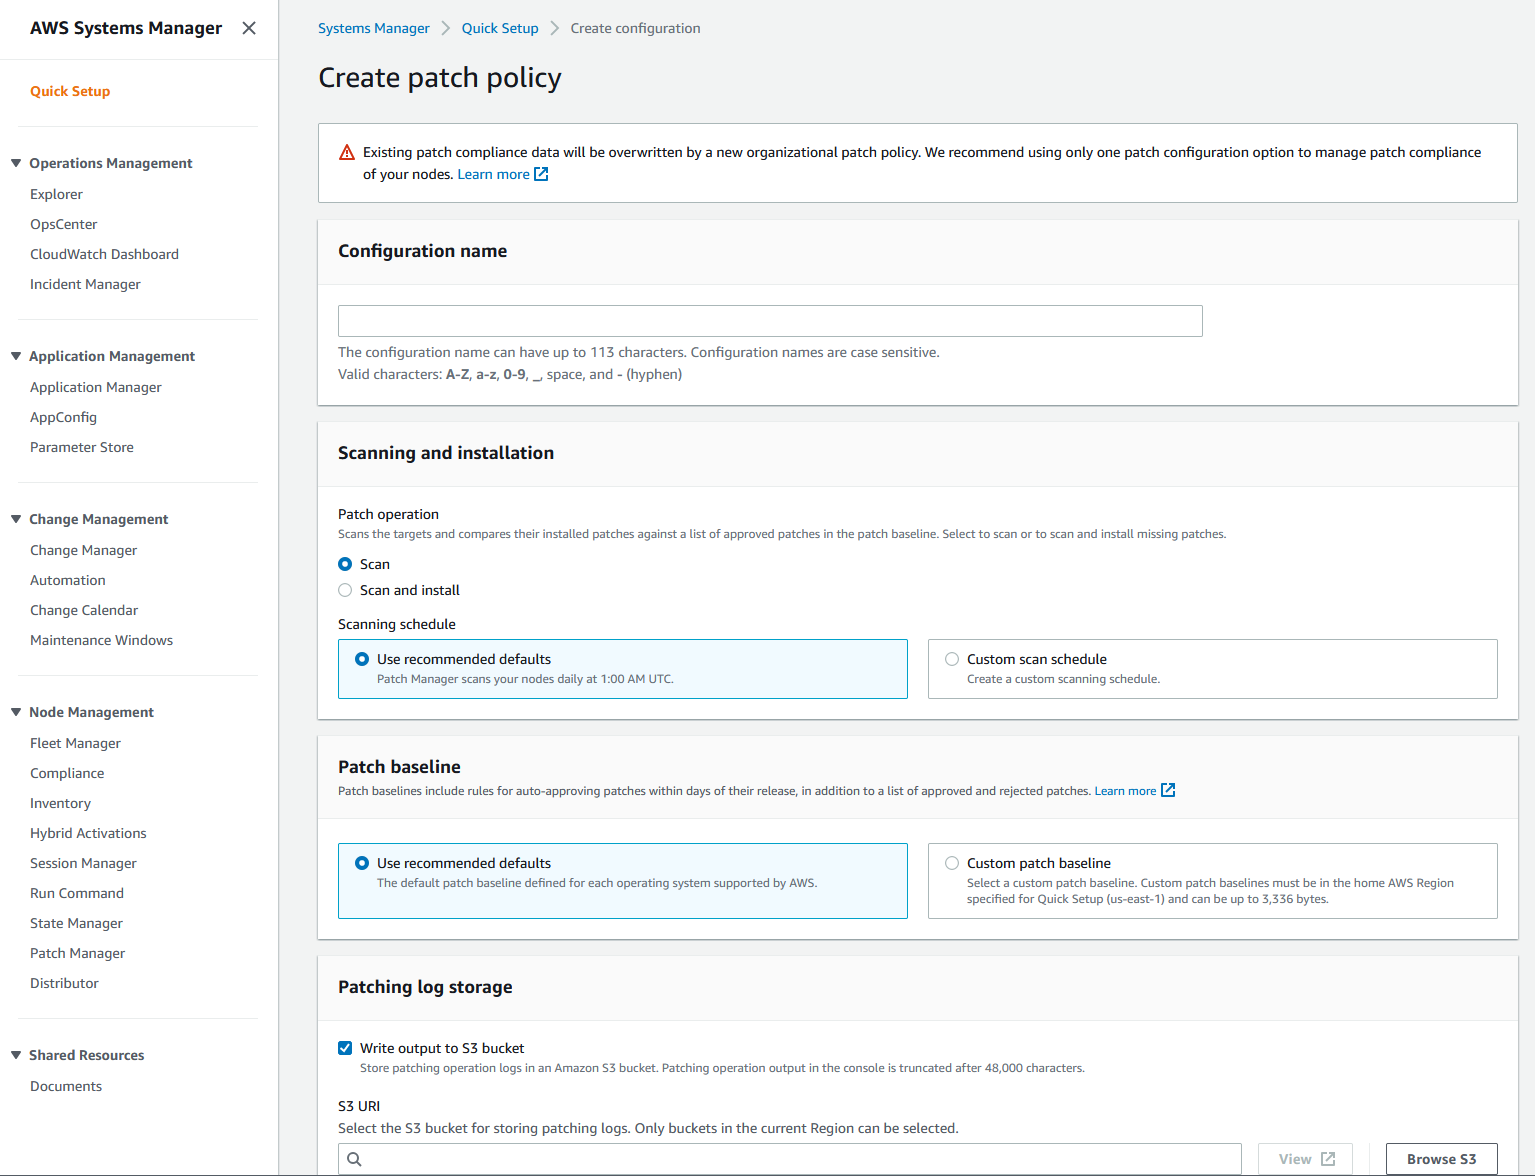
Step 3: Specify configuration options
Each configuration type has a unique set of parameters to apply for this step...
 |
|---|
| You will see something different depending on which quick start config you chose |
so I won't be getting into the required arguments for each one. Generally speaking the next step is to create a resource group to organize your resources. Resource groups are collections of resources that share common attributes. By grouping resources, you can view them collectively and apply policies and actions to them together. Watch "Patch and manage your AWS Instances in MINUTES with AWS Systems Manager" to see this step in action.
Step 4: Deploy, Review, and Manage Your Resources
Once you have created a resource group, you can view and manage your resources from the AWS System Manager console. You can also create automation workflows, run patch management, and perform other operations on your resources.
Resources:
AWS Systems Manager Introduction
Patch and manage your AWS Instances in MINUTES with AWS Systems Manager
Getting started with AWS System Manager
See you in Day 54.

